Showing posts with label crafting and revamping. Show all posts

Wednesday, June 4, 2014

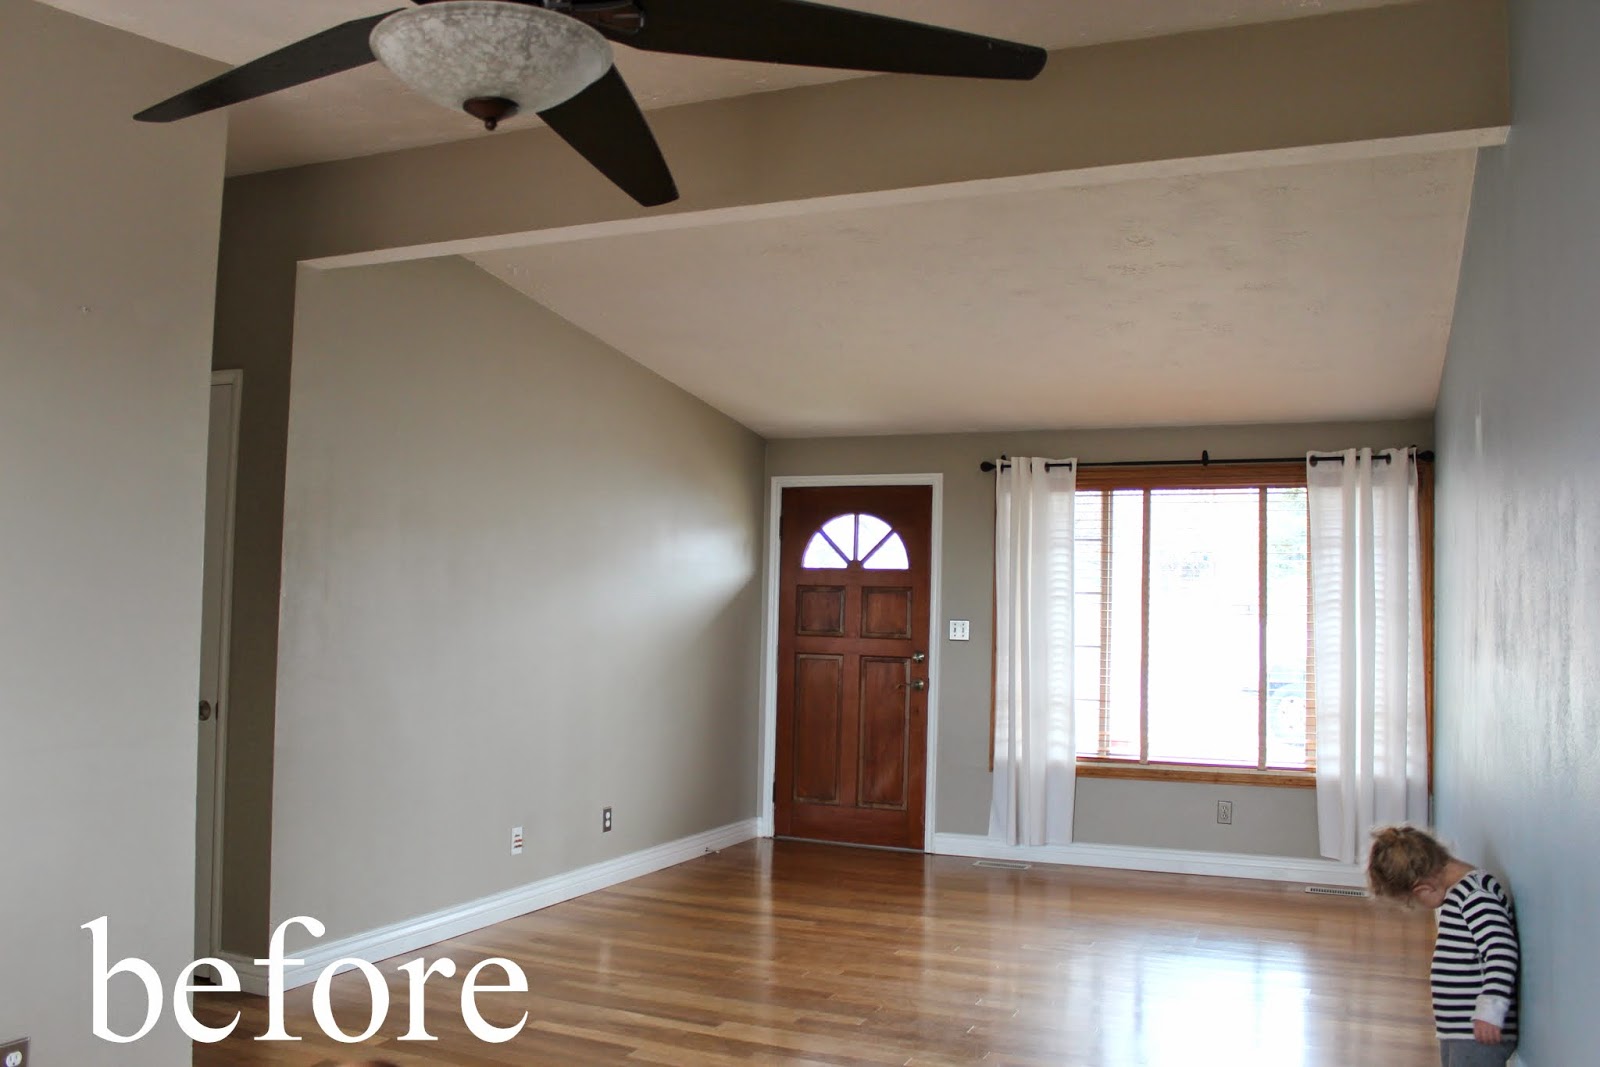
before and after: living room


I really wanted our living room to be bright and comfortable but after buying our house we were working on a tight budget,
I knew from experience that there were lots of ways I could cut costs but I also felt strongly about not cutting corners on some big items, like couches, that would hopefully last us a loooong time.
I still don't feel like the space is complete (I'm not sure I ever will), but because lots of our pieces were inexpensive I don't think I'll feel too badly about switching some of them out down the road if I find things I like better.
And I'm not in love with our bitsy tv on top of the piano, but it works for now especially when I need a shower and want to anchor Minnie with a show for a minute.

I went with white paint (big surprise...I'm having a serious moment with white), but the minute we painted over the blue and tan I felt like the space opened up and brightened up infinitely.
I was afraid the room would feel way too, um....white, but by painting some furniture, the front door, and adding colorful pillows and art I felt like it offset it just how I wanted it to.

So, if you're just dying to know where I got everything, here is a quick run down of the room:

Piano and bench: we found for $275 on KSL classifieds from a cute old couple. I painted the bench. I'm still thinking about painting the piano but I'm not sold on a color yet.
Couches: We got these from Down East Outfitters. They weren't cheap but we got them on a holiday weekend so they were an additional 10% off
Rug: rugsusa.com where most rugs are often 50% off
Dining table: This was originally $900 from West Elm but we got it at Down East Outfitters on clearance for $100
Dining chairs: Got these free from Robert's mom's neighbor
Lamps: Standing one is from Ikea and table lamp is from TJ Maxx...how I love both of those stores!
Coffee table: Ikea (I want to get a new one soon)
Side table: I got this thrift shopping for $5 and then painted it using paint the previous owners had left
Curtains: TJ Maxx
Pillows: The green one is from TJ Maxx and the long black and white one is from Ross but all the others are pillow covers from H&M home online for a steal! The couches came with lots of pillows that I didn't like so pillow covers were the answer.
Throw: Pottery Barn
Picnic basket: $8 from DI
Frames: Most of these are from DI for $2 or less. I looked for frames with mats and then painted the frames and the mats white. All of the other frames are from Target or Ikea.
Artwork: I bought a few pieces at art markets, thrifted a few and painted the flowers, ampersand and flamingo myself. 
Hallway rug: Urban Outfitters
Vases: thrifted, a gift and the small one is from H&M Home
Crocheted flowers: A gift from a friend who owns this cute shop on Etsy
Placemats: $3.50 from TJ Maxx

Tuesday, April 8, 2014

kitchen update


So far the kitchen is about the only room in our house that I feel like is almost complete.
Most of our walls are bare because I am having serious commitment issues regarding art and accessories.
The kitchen still isn't totally finished but I have to say that it has quickly become one of my favorite spaces in our house since we painted.

I'm not sure what it is right now but I am slightly in love with white.
I just feel like it is so fresh and clean.
When I told my mom over the phone I was going to paint the majority of our walls in the house white I swear I heard her jaw hit the floor.
I was the girl who converted my white-wall-loving parents to color enthusiasts and they now have a house full of non-white walls.
My sophomore year of high school I pulled out a picture of a startling orange room from a Pottery Barn catalog and told my parents that this was the color I'd like to paint my new room.
My jaw probably hit the floor when the two of them agreed and my dad spent a day painting it with me.

And now, more than 10 years later, here I am with a house full of white walls.
Interesting how the tables turn, eh?
But gosh, isn't a white kitchen just the prettiest thing you've ever seen?
The beige motif going on before we painted the walls and the cabinets was more than I could handle.
Those light oak cabinets? Bleh!
And whoever invented cabinets without handles or knobs should be sued immediately.

I'm still not in love with the backsplash, the counters or the floor but ever since we painted everything white they all somehow seem a lot less beige and a lot more palatable.
They are all still on our "when we have more money we'll change this" list but I don't mind them for now.
I also am not a big fan of our old, white appliances, but they also fit on the list I mentioned above.
I'll be dreaming of stainless steal until then.

The one thing I was especially nervous about with our kitchen was the lack of counter space.
As you can see in the before picture there was a little eat-in counter under the window but it was so narrow and weird and was way too low to provide any additional counter space.
I scoured KSL classifieds for an island of some sort to come to our rescue and by some miracle we found this white one for $40.
Those things don't typically sell for less than $100 (and that's if you're lucky) but I was the first one to call the seller and even though he had dozens of callers after me offering even more than $40, that gem of a man held to his word and kept it for me for $40.
And the thing has worked perfectly for the space and I couldn't imagine our kitchen without it.
The huge window above it lets so much light in and makes the space feel so much bigger and brighter.
And the fact that there's a bit of a mountain and lake view doesn't hurt too much either.

So after so many more paragraphs than I ever intended to write about our kitchen...here she is in all her glory.
I am so happy with the finished product and can't wait to share more home updates once I finally bite the bullet and start hammering some nails in the walls to get all our pictures up.

Thursday, April 18, 2013

reusing {in honor of earth day}

Ok, so it wasn't really in honor of Earth Day (which is Monday, btw) but this had to be done.
I got this huge dress/skirt from a clothing exchange a few months ago, and I really, really loved the fabric.
The fit of the skirt...not so cute.
So, I found this tutorial for a simple little dress and decided it was time.
I have not sewn a full article of clothing in probably 10 years and I was completely intimidated.
However, even after my fair share of mistakes, somehow I produced (albeit imperfect) a little dress for Min.


It's a little big for her, but I like the loose and comfy feel of it and as you can see, she's pretty pleased with it too.
This little experiment has now given me some courage in the sewing department and I'm excited to see what else I can whip together.
And I may or may not have made about four more of this same dress in different sizes and fabrics...just because.
I guess I'm hooked or something.

Thursday, February 14, 2013

valentining


Here is a taste of a few of the Valentines we'll be handing out today.
Homemade Valentines are where it's at in my book.
Wishing you and yours a Happy Valentines Day!
XOXO

Monday, February 4, 2013

a love fest


Every year my cute friend, Shelly, and her sister Kalleen put together the most amazing Valentine-making party.
The best food. The best crafts. The best company. Period.
I look forward to it all year long.
If I had half their creativity I'd be a serious force to be reckoned with.
In the meantime, I just go to their parties to try and soak a little of it in by osmosis or something.
A girl can dream.

My Valentines were left wanting, but I got some good ideas to try out myself later.
I'm not sure what it is, but this year I am seriously pumped about Valentines.
Call me Cupid.
But really, a party like this filled with lots of ladies you love and the most delicious pink treats is sure to get your Valentines juices pumping, wouldn't you agree?

Monday, January 21, 2013

a little valentine cheer


I'm sure you've seen these all over Pinterest, as have I, but I decided it looked easy enough and I needed a little holiday cheer and craftiness in my life so it was time to create my own.
Seriously, it was SO easy and was a lot of fun to make.


I am honestly the WORST at cutting out shapes by hand.
Ask my sister, the first 3 hearts I tried to cut out on my own were truly disastrous.
Luckily I had a heart-shaped cookie cutter nearby to save the day, so I just traced the shape on the felt and cut from there.
Perfect hearts every time.
You may like a more rustic look with hearts of different sizes, so if you're good at cutting out hearts yourself, props to you...go for it!

Once you've finished cutting out your hearts lay them out side-by-side to see if the garland will be the length you'd like.
Start sewing a straight stitch horizontally on your first heart and then place the second heart right behind it so you just sew together one after the next.


Some of mine overlapped slightly, which I actually kind of like.
Once you've got all of them sewn together in a straight line take some ribbon and stitch about a foot and a half of it on each end.
And voila! Your garland is complete. This seriously took me about 45 minutes total to complete.


If you want your hearts to lay flat, string the garland against a wall, a mantle or some other flat surface.
However, I really liked the way the hearts strung over our window kind of went every which way.


Happy (almost) Valentines day!
We've got to find something to celebrate around here because this weather is killing us!

Thursday, September 27, 2012

our newest addition


Our porch has been in need of major sprucing up ever since we came back from our summer in Pennsylvania.
The wreath I'd left out there since Christmas (yes, Christmas!) was falling apart.
No surprise there.
When you're taking care of your parents house while they're gone for three years somehow it's hard to remember that you CAN decorate a few things, the front porch being one of them.
So I decided to spend one morning (which turned into half a day) toiling over making this wreath.
All in all, I feel pretty good about it. The wreath, that is, not the taking up half my day part. 
When Robert returned home from school he lovingly approved of my efforts.
The other thing I like about this puppy is the fact that it will probably last at least 6 months out there on that front porch of ours.
The burlap is fall-ish, but it could even glide through winter without a problem depending on the color of ribbon used. 
I love myself a craft project that will last through more than one season.
Go ahead and check out the tutorial over here if you'd like to do some porch-sprucing-up yourself!

Friday, September 21, 2012

transformation station

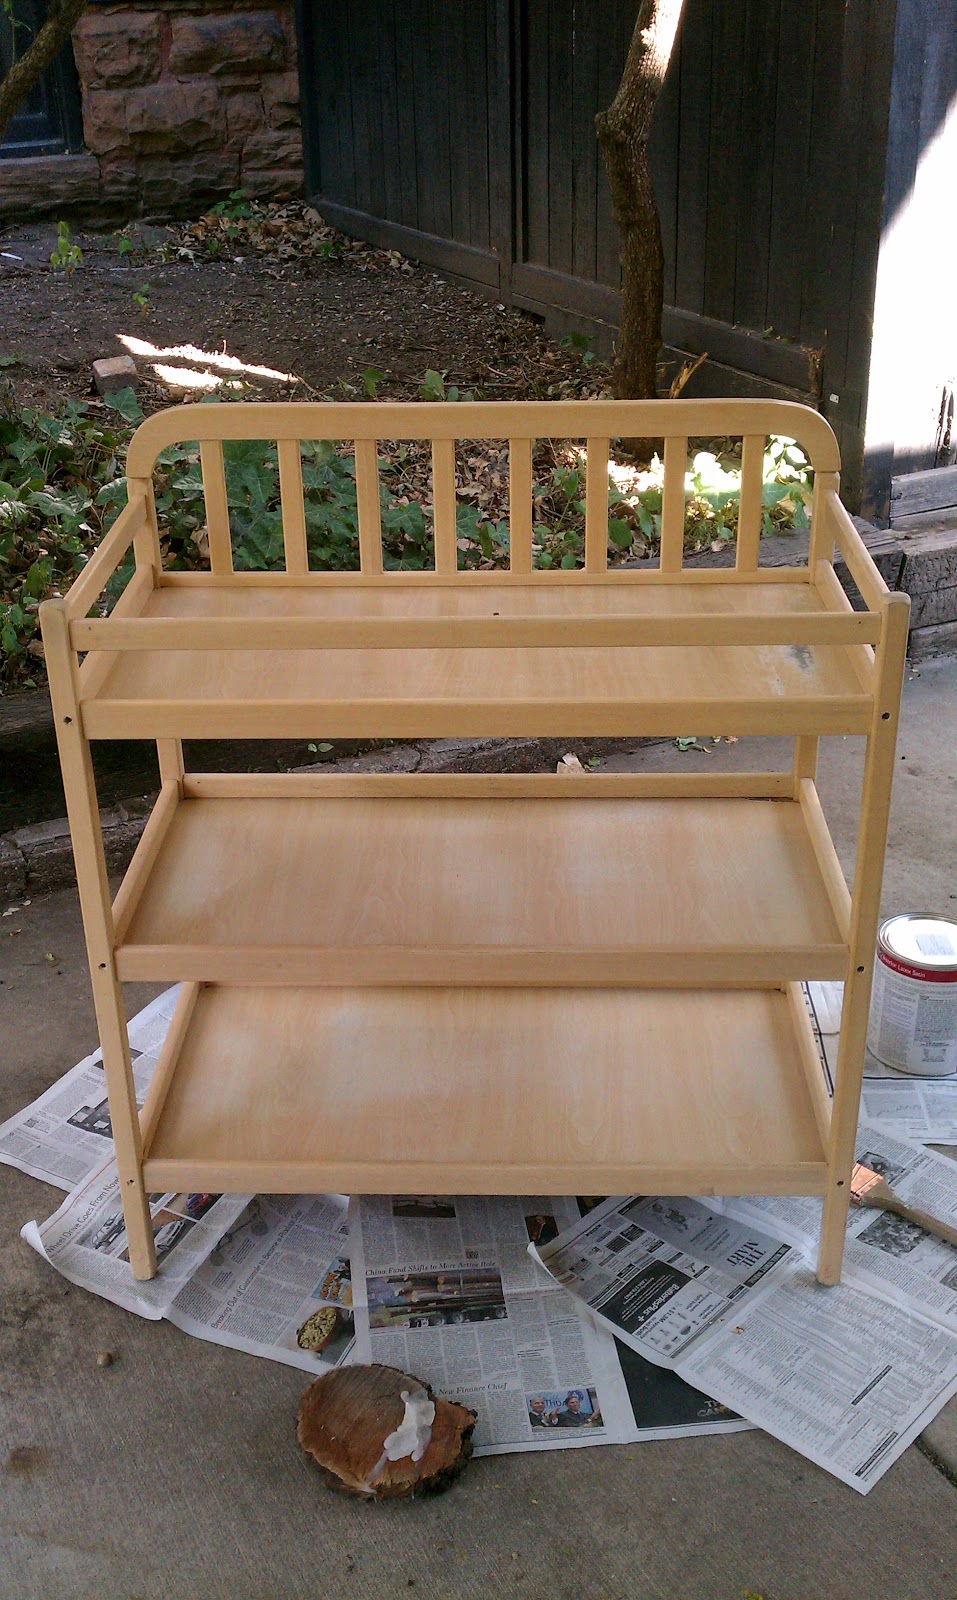
Some friends of ours were moving to Canada and were selling pretty much everything they owned...for CHEAP! I was on the the hunt for a changing table and just so happened to come across their ad on KSL. And guess how much they were charging for this little beauty? $5!! Such a steal!


It is now one of the only pieces of furniture, or really anything besides clothes, that we own in this house, so of course I had big plans for it. It had great bones, it just needed a bit of a facelift. Bob's vote was yellow, mine was turquoise, but just this once I gave into Bob's style preference. And here's the finished product...


The changing table was probably the cheapest piece of the whole project. Fabric is pricey people! Luckily JoAnn's was having a slight sale. I got the baskets for like $1 each at Goodwill and spray painted them to match. I followed this tutorial for the changing pad cover. The nice thing about it is it can be changed so I could make another one really quickly if I wanted to go for a little bit different color scheme. In the end I'm pretty pleased. It definitely gives the upstairs a PUNCH of color that I was hoping for. Pretty bright, eh??